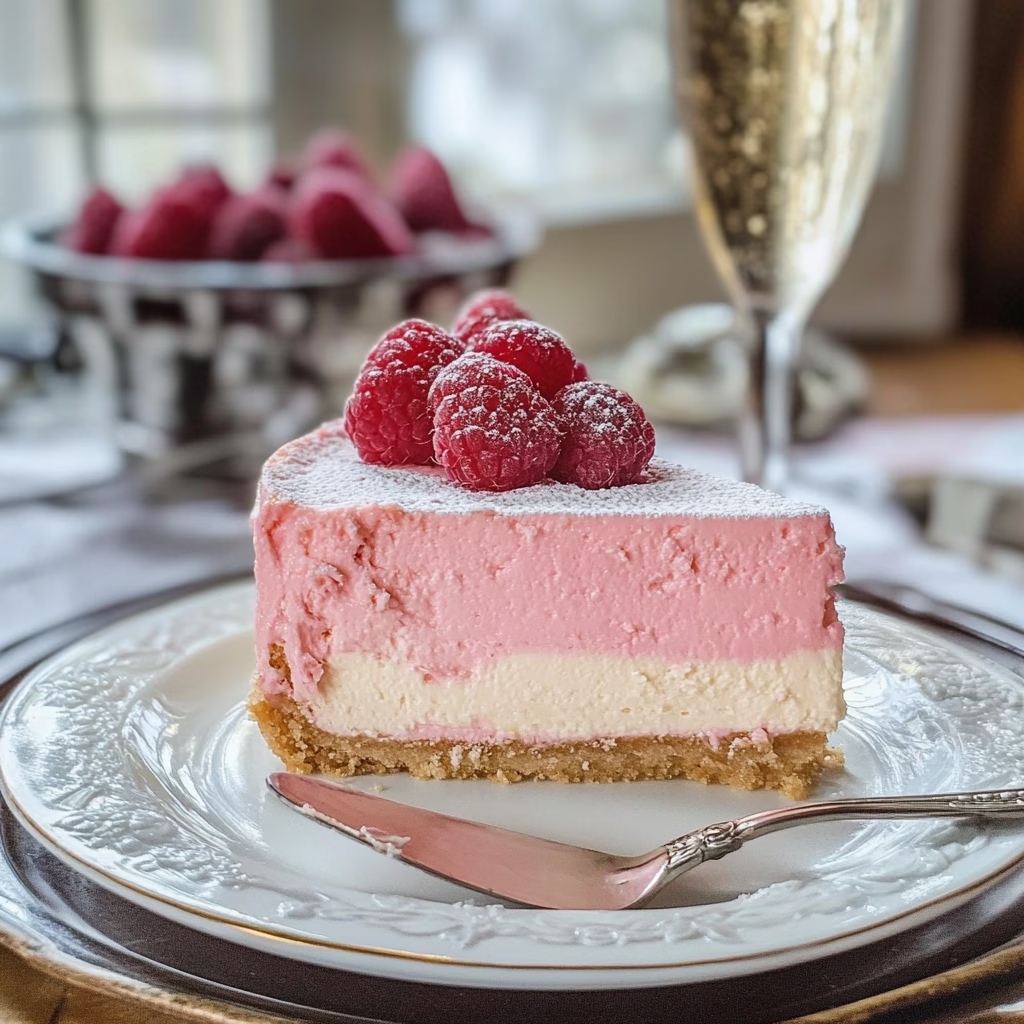
Oh, let me tell you about one of my absolute favorite desserts: the Pink Champagne Cheesecake! This luscious treat is the epitome of indulgence and celebration, and I just can’t get enough of it. The first time I made this cheesecake, it was for a friend’s bridal shower, and it was a hit! The combination of creamy cheesecake with a hint of bubbly champagne creates a magical combination that’s perfect for any festive occasion.
What makes this cheesecake truly unique is not just the delightful blend of flavors but also that beautiful, blush hue. You can even get creative with the color! Add in just a touch of pink food coloring, and you’ve got yourself a stunning dessert that tastes as good as it looks. Perfect for creating memorable moments around the dessert table!
What’s in Pink Champagne Cheesecake?
Graham Cracker Crumbs: These form the base of our cheesecake crust, giving it that lovely crunch. I usually buy pre-crushed crumbs, but if you want to channel your inner chef, feel free to crush some full sheets yourself!
Unsalted Butter: Melted, this delicious fat helps bind our crust and adds richness. Trust me; you want the unsalted kind to control the sweetness of your dessert.
Granulated Sugar: We use this in both the crust and filling for that delightful sweetness.
Cream Cheese: The heart and soul of the cheesecake! You want it softened to room temperature so it mixes in perfectly. I always opt for full-fat cream cheese for a rich and creamy texture.
Vanilla Extract: Just a splash of this heavenly extract elevates the flavor of our cheesecake and adds warmth.
Eggs: These provide structure to the cheesecake—essential for that perfect, creamy consistency.
Heavy Cream: A touch of this luxury adds richness and helps balance out the flavors.
Pink Champagne or Sparkling Wine: Here’s where the magic happens! Use your favorite bubbly to give this cheesecake its signature flavor. Honestly, I’m a fan of a good Prosecco – if it tastes good in a glass, it’ll taste even better in your cheesecake!
All-purpose Flour: Just a couple of tablespoons help to stabilize our batter and prevent it from cracking.
Pink Food Coloring: Optional, but if you want that perfect pastel blush, why not?
Fresh Raspberries or Cranberries: These gorgeous fruits are optional but provide a fantastic tartness that complements the sweetness of the cheesecake. Feeling fancy? Go for sugared berries for extra flair!
Is Pink Champagne Cheesecake Good for You?
Okay, let’s be real—this cheesecake isn’t what you’d call a “health food.” But hey, life is all about balance, right? This dessert is rich in flavors and textures thanks to its creamy filling and buttery crust. Here are some of the key ingredients and their considerations:
Cream Cheese: While rich and indulgent, cream cheese does come with its fair share of calories, so this might not be an everyday dessert!
Heavy Cream: It’s delicious, but there’s no hiding it—heavy cream is high in calories and fat. A little bit goes a long way in this cheesecake, though!
Pink Champagne: What’s celebratory about that? A glass of bubbly here and there never hurt anybody, and it does add a unique flavor to our dessert!
So while this dessert is not designed to be part of a healthy eating plan, it’s perfect for special occasions!
Ingredients for Pink Champagne Cheesecake
– **For the crust**:
– 1 ½ cups graham cracker crumbs
– ½ cup unsalted butter, melted
– ¼ cup granulated sugar
– **For the cheesecake filling**:
– 2 (8 oz) packages cream cheese, softened
– 1 cup granulated sugar
– 1 teaspoon vanilla extract
– 3 large eggs
– ½ cup heavy cream
– ¾ cup pink champagne or sparkling wine
– 2 tablespoons all-purpose flour
– Pink food coloring (optional, to achieve desired color)
– **For the garnish**:
– Fresh raspberries or cranberries (optional)
– Sugar for coating (for sugared berries)
*Serves: 10-12*
How to Make Pink Champagne Cheesecake?
1. **Prepare the crust**: Preheat the oven to 325°F (163°C). In a medium bowl, mix together the graham cracker crumbs, melted butter, and sugar until fully combined. Press the mixture firmly into the bottom of a 9-inch springform pan to create a compact layer. Bake for 10 minutes and then remove it from the oven to cool.
2. **Make the cheesecake filling**: In a large mixing bowl, beat the softened cream cheese with an electric mixer until smooth and creamy. Gradually add the granulated sugar, continuing to mix until nice and fluffy. Stir in the vanilla extract.
3. **Add eggs and champagne**: Add the eggs one by one, mixing on low speed after each addition just until combined. Avoid overmixing, as we want a smooth filling. Stir in the heavy cream, pink champagne, and flour. If you’re feeling festive, add a little pink food coloring too!
4. **Combine and pour**: Carefully pour the cheesecake filling over the cooled crust in the springform pan, smoothing the top with a spatula.
5. **Bake the cheesecake**: Pop it in the oven and bake for about 50-60 minutes or until the edges are set but the center still jiggles slightly. Remember, it will continue to firm up as it cools.
6. **Cool and refrigerate**: Turn off the oven and let the cheesecake sit inside with the door slightly ajar for about an hour. This helps to prevent cracks. Once cooled to room temperature, pop it in the fridge for at least 4 hours, but overnight is even better!
7. **Prepare the sugared berries (optional)**: If you want to add a garnish, rinse your fresh berries, then roll them in granulated sugar to coat. Let them sit and dry for about 30 minutes for a lovely, glittery finish.
8. **Serve**: Gently remove the cheesecake from the springform pan. Top with sugared berries if desired, slice into wedges, and enjoy your Pink Champagne Cheesecake!
Oh, What a Sweet Touch!
One last thing before you get started—if you’re like me and love to experiment, feel free to incorporate different flavors or toppings. A drizzle of raspberry or strawberry sauce can take it to the next level. I can’t wait for you to try this delightful recipe—it’s perfect for birthdays, anniversaries, or just an indulgent Saturday night at home. Trust me, your loved ones will adore you for it! Please come back and share your experience; I would love to hear how it turned out for you! Enjoy baking!


