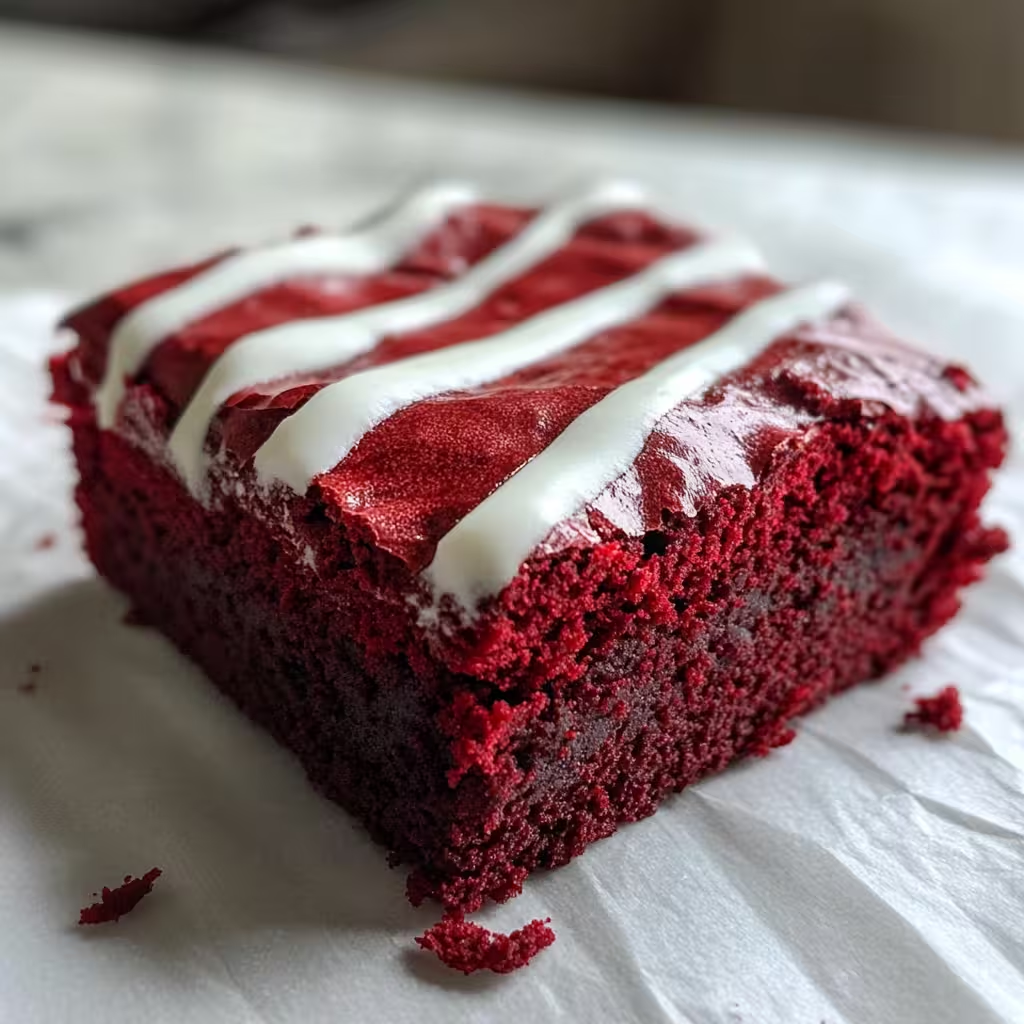
Oh, let me tell you about one of my absolute favorite treats – Fudgy Red Velvet Brownies! These little bites of heaven have a way of bringing a smile to your face with their deep red color and rich flavors. I still remember the first time I made them. It was a chilly February afternoon, the kind that makes you crave something cozy and sweet, and I was trying to impress some friends with a Valentine’s Day treat. The moment those brownies came out of the oven, the delicious smell wafted through my kitchen, and it felt like a hug in the form of dessert!
What I adore about these brownies is how they marry the classic fudgy brownie texture with the unique, velvety flavor of red velvet cake. Topped with a dollop of cream cheese frosting, they’re not just a dessert; they’re an experience. Plus, they’re a fantastic way to brighten up any occasion – whether it’s a birthday, a holiday, or just a regular Tuesday that needs a little extra love.
What’s in Fudgy Red Velvet Brownies?
Now, let’s take a closer look at what makes these brownies so scrumptious!
Unsalted Butter: The secret to that rich, fudgy texture! I often opt for unsalted butter to control the saltiness of the finished product.
Granulated Sugar: A classic sweetener that gives these brownies their delightful sweetness. Don’t skimp on it – it’s what makes them a treat!
Large Eggs: These bind the ingredients together and contribute to the moistness of the brownies. Make sure they’re at room temperature for best results!
Vanilla Extract: Just a touch of vanilla elevates the flavor profile to something truly special.
All-purpose Flour: The backbone of the brownie. We need just enough to give structure, but not too much that they become cakey!
Unsweetened Cocoa Powder: This gives those brownies their rich chocolatey goodness. Opt for a good quality cocoa for a deep flavor.
Salt: A pinch of salt to enhance the sweetness and balance the flavors. Don’t skip it!
Baking Powder: Just a smidgen ensures that fudgy brownie doesn’t feel too dense.
Red Food Coloring: This is what gives these brownies their signature color. I love using gel food coloring for its vibrancy!
Semi-sweet Chocolate Chips (optional): Because who doesn’t love a little extra chocolate? These can be stirred in for a melty surprise.
Cream Cheese: A key player for the frosting, it adds that classic tangy flavor that pairs beautifully with chocolate.
Powdered Sugar: This sweetens the frosting to perfection, making it smooth and spreadable.
Milk: Just a splash to help the frosting reach that creamy consistency.
Is Fudgy Red Velvet Brownies Good for You?
Alright, let’s not kid ourselves. These brownies are certainly a treat and should be enjoyed in moderation!
Cocoa Powder: While they are rich in flavor, unsweetened cocoa can offer some antioxidants, which can be a nice bonus alongside those indulgent flavors.
Cream Cheese: It does add some calcium and protein, but it’s best to enjoy this treat occasionally, rather than as part of your daily diet if you’re watching your fat intake.
On the flip side, these brownies are not exactly a health food; they’re meant to be savored as a dessert. If you’re looking to make them a tad healthier, you could use substitutes like unsweetened applesauce for part of the butter or whole wheat flour instead of all-purpose. But let’s be honest – the appeal of these brownies lies in that delicious fudginess!
Let’s Get Baking: How to Make Fudgy Red Velvet Brownies?
Ready to make some magic in your kitchen? Here are the steps:
1. Preheat your oven to 350°F (175°C) and prepare an 8×8 inch baking pan by greasing and lining it with parchment paper. Trust me, this makes for easy removal later!
2. In a medium saucepan over low heat, melt the unsalted butter. Once it’s just melted, take it off the heat and stir in the granulated sugar until everything is well mixed.
3. Let that buttery mixture cool down a bit, then crack in the eggs one by one, stirring well after each addition. Add the vanilla extract here, too.
4. In a separate bowl, whisk together the all-purpose flour, unsweetened cocoa powder, salt, and baking powder.
5. Now, gradually add those dry ingredients to the wet mixture, folding gently until it’s just combined. Be careful not to overmix!
6. Stir in the red food coloring until the batter is a stunning, rich red. If you’re feeling extra indulgent, fold in semi-sweet chocolate chips at this point.
7. Pour the batter into your prepared pan, spreading it out evenly.
8. Bake for 20 to 25 minutes, or until a toothpick inserted into the center comes out with a few moist crumbs. The aroma will be divine!
9. While those brownies cool, let’s whip up the cream cheese frosting. In a bowl, beat together the softened cream cheese, powdered sugar, and milk until you have a smooth, creamy frosting.
10. Once the brownies have cooled, frost them with your scrumptious cream cheese frosting, and drizzle extra if you wish!
11. Cut them into squares, and get ready to enjoy!
Delicious Tips and Serving Suggestions for Fudgy Red Velvet Brownies
– If you want to up your frosting game, use a piping bag for a beautiful drizzle or swirl on top! It not only makes it look professional but also adds that extra touch of indulgence.
– Store leftovers (if there are any – let’s be honest, they might disappear fast) in an airtight container at room temperature for up to 4 days, or in the fridge for about a week. Not that they’ll last that long!
– These brownies are great served with a scoop of vanilla ice cream or a dollop of whipped cream for that extra decadence.
So there you have it! Fudgy Red Velvet Brownies that are sure to impress anyone lucky enough to try them. I hope you give this recipe a shot and create some sweet memories in your kitchen. Don’t forget to share your experiences and maybe snap a few pics – I’d love to see how yours turn out! Happy baking!


